A checklist for outdoor hardscapes is the single most reliable tool for keeping your patio, walkway, or retaining wall project on track from day one. Most project failures trace back to skipped steps in planning, not poor material choices. This guide walks you through every critical phase: site evaluation, design zoning, materials selection, installation, budgeting, and maintenance. Whether you are tackling a backyard patio in Marietta or a front walkway in Smyrna, following a structured outdoor hardscape planning process protects your investment and prevents expensive corrections later.
Poor drainage causes settling, cracking, and early hardscape failure, making site assessment the first and most consequential step on your checklist. Before you select a single paver or stone, you need to understand what is happening beneath your feet.
Here is what to assess during your site evaluation:
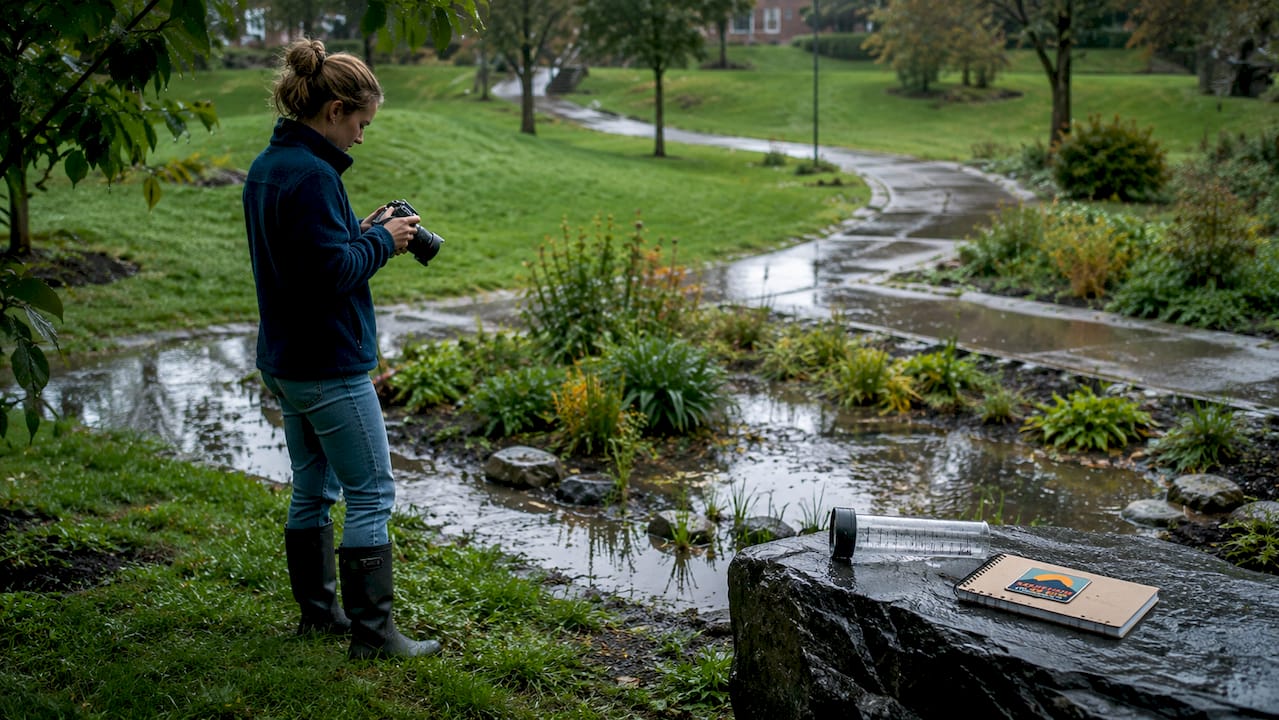
Pro Tip: After a heavy rain, walk your yard and photograph where water pools or flows. That drainage map is more accurate than any dry-weather assessment and will directly inform your grading plan.
Hardscape materials should be chosen after establishing functional zones and traffic flow, not before. Skipping this step is how homeowners end up with a beautiful patio that nobody actually uses because it is too far from the kitchen door or too close to the property line.
Define your zones first. A patio for dining, a firepit area for gathering, and a walkway connecting them serve different purposes and require different surface materials, dimensions, and clearances. A dining patio needs at least 12 by 12 feet for a table and four chairs with comfortable movement around them. A firepit zone needs a non-combustible surface and at least 10 feet of clearance from structures.
Plan circulation and lighting early in the design phase to avoid crowding and improve long-term satisfaction. Traffic paths should feel natural, not forced. Walk the route yourself before marking anything. Lighting placement belongs in the design phase because conduit for low-voltage wiring is far easier to install before the base layers go down.
Avoid the common mistake of overcrowding features. A yard with a pergola, firepit, water feature, raised beds, and a putting green often ends up feeling cluttered and difficult to maintain. Prioritize two or three features that match how you actually use your outdoor space.
Evaluating grading, soil type, drainage flow, and underground utilities must happen before you finalize your material list. Once site conditions are confirmed, the installation checklist follows a specific sequence that cannot be reversed.
Standard installation sequence:
Material durability comparison:
| Material | Freeze-thaw performance | Maintenance level | Best use |
|---|---|---|---|
| Concrete pavers | Excellent | Low | Patios, driveways |
| Natural flagstone | Good | Moderate | Patios, walkways |
| Poured concrete | Moderate | Low to moderate | Driveways, paths |
| Gravel | Excellent | Low | Paths, drainage areas |
For Georgia projects, concrete pavers and natural flagstone perform well given the region’s mild winters. Check the hardscaping materials list for Georgia to match material specs to your specific climate zone.
Pro Tip: Invest in the base, not the surface. A premium paver on a poorly compacted base will fail within two to three years. A budget paver on a correctly installed base will last decades.
Allocate a 10 to 20% contingency fund within your project budget for unforeseen site conditions such as poor drainage, buried debris, or utility conflicts. This is not optional padding. It is a realistic buffer that experienced project managers build into every estimate.
Your budgeting and coordination checklist should include:
Understanding the hardscape installation workflow before you meet with contractors puts you in a stronger position to ask the right questions and evaluate bids accurately.
A completed hardscape still requires consistent care to maintain its appearance and structural integrity over time. Skipping maintenance is how a beautiful patio becomes a weed-covered, uneven hazard within five years.
Follow this annual maintenance sequence:
For Atlanta-area homeowners, the landscape drainage solutions guide covers region-specific drainage maintenance in detail.
A successful outdoor hardscape project depends on completing site evaluation and drainage planning before selecting any materials or finalizing a design.
| Point | Details |
|---|---|
| Site evaluation comes first | Assess soil type, grading, and utilities before choosing materials or finalizing design. |
| Base depth determines durability | Excavate 7 to 9 inches and compact gravel in lifts for a stable, long-lasting surface. |
| Edge restraints are non-negotiable | Without them, freeze-thaw cycles and foot traffic cause paver migration and base failure. |
| Budget for the unexpected | Reserve 10 to 20% of your total budget for unforeseen site conditions and utility conflicts. |
| Maintenance extends lifespan | Annual inspections, joint sand refresh, and drainage checks prevent premature hardscape failure. |
After working alongside homeowners and contractors across the Atlanta metro area, the pattern is consistent. Projects that fail almost always skip the same two steps: proper soil assessment and detailed written scopes of work.
Homeowners get excited about the finished look and rush past the unglamorous part, which is understanding what the ground beneath them will actually support. Clay soil in Georgia behaves very differently from the sandy loam you might find in other regions. It holds water, expands, and contracts. A base that works in one yard may fail completely in another 50 feet away.
The second mistake is assuming a contractor understood what you meant. Write it down. Every material, every depth, every cleanup expectation. I have seen projects go sideways not because of bad workmanship but because two people had different mental pictures of the same job.
Start with zones and drainage. Pick materials second. Get everything in writing. Those three habits will protect you from the majority of hardscape headaches.
— Eric
Planning your hardscape project is only half the work. The other half is sourcing materials that actually perform under Georgia’s conditions.

Mountainhighmulch supplies premium gravel, sand, stone, topsoil, and sod to homeowners and contractors across Atlanta, Marietta, and Smyrna. Our team can help you match the right base material to your soil type and project specs, so you are not guessing at the supply yard. Browse our top-rated landscape materials or visit one of our two convenient Georgia locations for expert guidance. We also offer reliable delivery throughout the metro area so your project stays on schedule.
A hardscape checklist covers site evaluation, drainage planning, design zoning, material selection, installation steps, permit review, budgeting, and ongoing maintenance. Following each phase in order prevents the most common and costly project failures.
Standard paver patio installations require 7 to 9 inches of excavation, including 4 to 6 inches of compacted gravel base and 1 inch of bedding sand. Clay soils may require additional depth to prevent frost heave and settling.
Permits are typically required for retaining walls over 30 inches and for projects that alter drainage patterns. Check with your local municipality and HOA before starting any excavation or construction.
Book your contractor in fall or winter for spring installation. Contractor lead times extend weeks to months during peak spring and summer seasons, and early booking gives you better scheduling flexibility and pricing leverage.
Inspect your hardscape every spring for settling, cracked joints, and drainage issues. Refresh polymeric joint sand every two to three years, pressure wash annually, and reapply sealer every two to four years depending on the product and traffic level.