An uneven yard is more than an eyesore. It creates puddles that kill grass, makes mowing feel like an obstacle course, and can direct water toward your home’s foundation where it causes real structural damage. This yard leveling guide walks you through everything you need to fix those problems yourself, from choosing the right materials and tools to executing the work in the correct sequence. Whether you are dealing with a few low spots or a yard that needs a full regrade, you will find the practical steps and expert tips here to get lasting results.
| Point | Details |
|---|---|
| Use the right soil mix | A 70/30 sand-topsoil blend improves drainage and provides nutrients for stable, long-lasting results. |
| Grade away from your foundation | Maintain a 5% slope standard of 6 inches per 10 feet to protect your home from water damage. |
| Apply topdressing in thin layers | Never exceed 1 inch per application to avoid smothering existing grass. |
| Time your project correctly | Level during active grass growth in spring or fall for the fastest turf recovery. |
| Expect repeat visits | Soil settling after leveling is normal; plan for follow-up applications over the first season. |
Before you start moving soil, gathering the right equipment will save you hours of frustration. Here is what you need for a standard DIY yard leveling project:
For the leveling material itself, experts recommend a 70/30 blend of coarse sand and quality topsoil or compost. The coarse sand improves drainage and gives the mix structural stability. The topsoil or compost holds moisture and provides the nutrients your grass roots need to grow through the new layer. Avoid pure sand on its own. It drains too fast, compacts poorly, and leaves you with an unstable surface that will shift over time.
The quality of your materials directly affects how long the results last. Cheap fill dirt can introduce weeds, compaction problems, and pH issues that fight against healthy grass. You can find guidance on selecting the best options for Georgia yards in this overview of top landscape materials.
Pro Tip: If your yard has clay-heavy soil, increase the sand ratio in your mix slightly and add compost to help break up compaction. In sandy soils, lean toward more topsoil to improve water and nutrient retention.
A solid plan before you pick up a shovel is what separates a lasting result from one that needs redoing next season. Follow these steps in order.
Pro Tip: Water the area lightly one day before leveling. Moist soil accepts topdressing better and compacts more evenly than bone-dry ground.
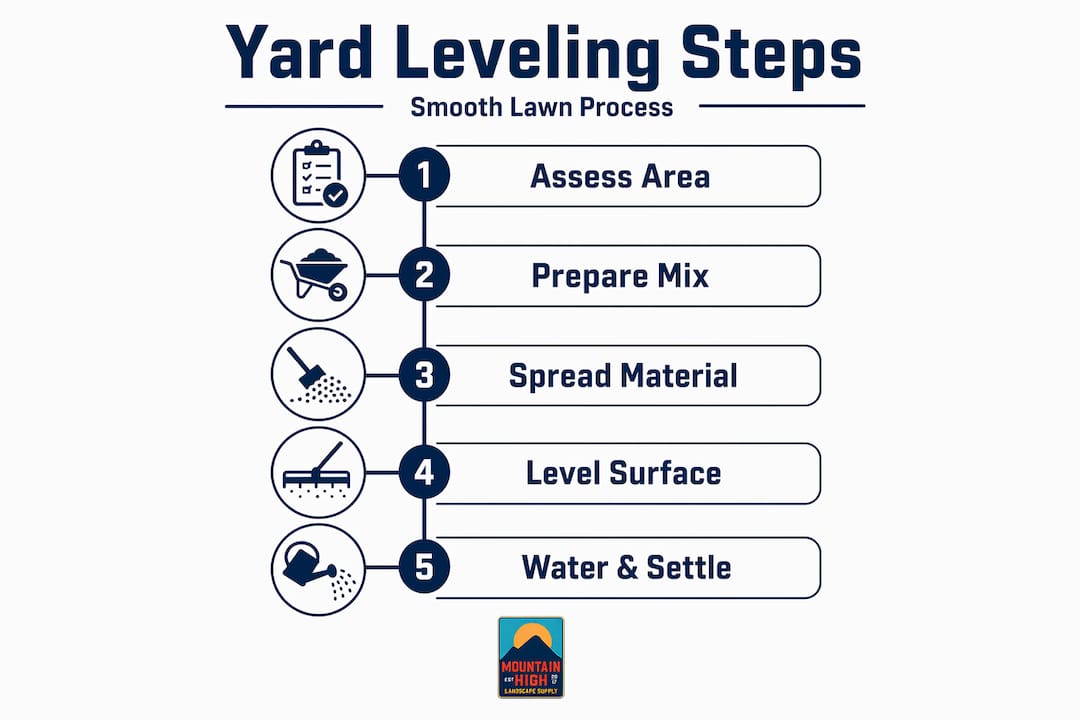
Topdressing handles minor unevenness well. For dips deeper than 3 inches or areas with persistent standing water, you need a full regrade. Topdressing is ineffective for deep dips because the volume of material required would bury the grass entirely.
Here is when a complete regrade makes sense:
For a full regrade, the process involves removing the existing sod, tilling the soil beneath to loosen compaction, redistributing soil to create the correct grade, and then re-laying sod or reseeding. This is heavier work, and heavy equipment rentals like skid steers or tillers start at around $100 per hour. For large projects, that cost adds up quickly, so weigh it against hiring a professional who charges $50 to $100 per labor hour excluding materials.
Pro Tip: Scalp your lawn before beginning a full regrade. Removing as much grass material as possible gives you a cleaner soil surface and better visibility of the grade you are building toward.
After regrading, expect the soil to settle. Professionals intentionally overfill low spots slightly to compensate for the compaction that happens with rain and foot traffic over the coming weeks.
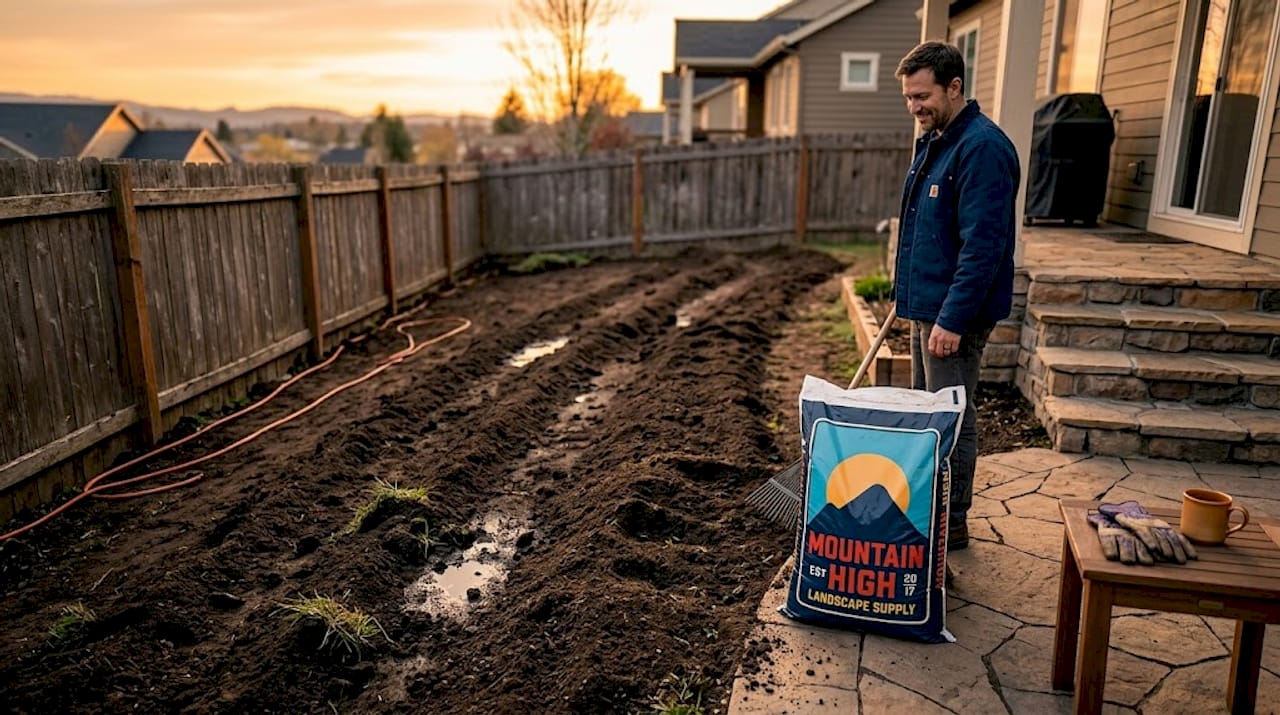
Getting the steps right matters, but avoiding the wrong moves matters just as much. These are the errors that most often cause homeowners to redo their leveling work:
After leveling, verify your results by observing the yard during the next rain. Water should sheet away from the house and toward the lawn’s perimeter or a designated drainage area. You can also check grading with a string level method to confirm the slope before and after the project is complete.
Choosing the right window for leveling has a direct effect on how fast the grass recovers. The optimal periods are mid-spring and early fall when grass is actively growing and soil temperatures are at least 50°F. Working in summer heat or winter dormancy slows recovery significantly and can result in bare patches that invite weeds.
After leveling, follow this approach to support recovery:
Pro Tip: Warm-season grasses like Bermuda and Zoysia, which are common across the Atlanta area, recover faster than cool-season grasses after leveling. You can be more aggressive with timing for these varieties in spring.
Timing leveling for active growth periods drastically improves recovery and gives you a better final result with less follow-up work.
I have worked with homeowners on leveling projects ranging from smoothing a few low patches to regrading an entire backyard that had been draining toward the house foundation for years. What I have learned is that preparation is where most projects succeed or fail. Homeowners who spend extra time mapping grades before they move any soil consistently end up with better results and fewer do-overs.
The biggest surprise most people encounter is how much soil settles after the first heavy rain. They fill a low spot, it looks perfect, and then three weeks later there is a depression again. That is completely normal. I always tell people to slightly overfill and plan on one or two follow-up passes before they consider the project finished.
My honest take on DIY versus professional help: for shallow topdressing across a typical suburban yard, doing it yourself with quality materials is absolutely worth it. For anything involving significant regrading close to the foundation, I recommend at least getting a professional assessment first. The cost of redirecting water the wrong way over several years far exceeds the cost of one expert consultation. And always invest in good material. A cheap fill will create new problems within a season.
— Eric

At Mountainhighmulch, we supply the exact materials you need for a successful leveling project, including coarse sand, organic screened topsoil, compost blends, and fresh sod for post-leveling restoration. Our team at our Marietta, GA, and Smyrna, GA locations knows Georgia soils and can help you calculate the right quantities and mixes for your specific yard conditions. Whether you pick up at our supply yards or use our delivery service across the Atlanta metro area, we make sure you get premium landscape materials that perform. Stop by or contact us today for expert guidance from our crew.
A 70/30 blend of coarse sand and quality topsoil or compost is the recommended standard. The sand improves drainage and structure while the topsoil provides nutrients and moisture retention for healthy grass growth.
Apply topdressing in layers no thicker than 0.5 to 1 inch at a time. Thicker applications can smother existing grass, so use multiple thin passes for deeper low spots.
The professional baseline is a 5% slope, which equals 6 inches of drop per 10 feet of distance away from your home’s foundation. This prevents water from pooling near the structure.
Mid-spring and early fall are ideal, when soil temperatures reach at least 50°F and grass is actively growing. Leveling during dormancy slows recovery and increases the risk of bare patches.
If low areas are deeper than about 3 inches or consistently hold standing water, topdressing alone will not be sufficient. A full regrade involving sod removal, tilling, and soil redistribution is needed for significant unevenness.